


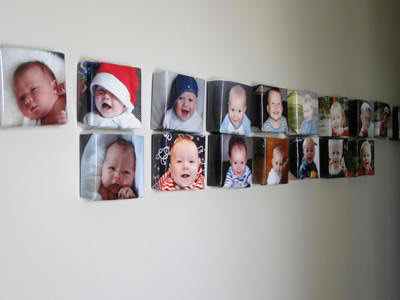
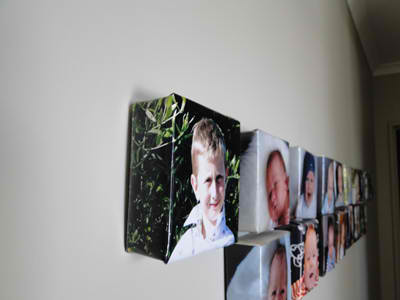
Here’s our DIY instructions on how to make your own photoblocks for under $10 and within 10 minutes. A very economical way to build up a gallery of your children, just like we have done with our children and their photos in the hallway.
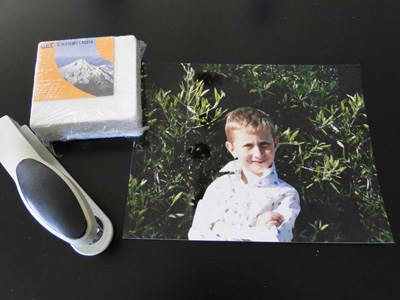
Find a small 10×10 block canvas at your local craft store. They are also at Bunnings, warehouse, and book shops. Cost is about $4
Find your favourite photos. Get the photo enlarged to 20x25cm size which costs about $4 per print.
|
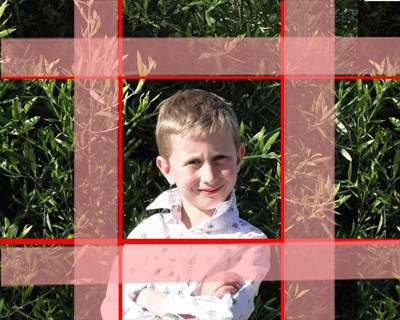
When choosing prints, look for ones where the face is centred, so that they will be centred on the block. Though it will still look artistic if your faces aren’t perfectly centred (just make sure that you place the block centred on the photo so that you have enough edges to wrap around). *if your face is not centred on the photo, you could use photoshop to add black borders around your photo so that your image is centred. *Tip – practise the technique first with A4 paper printout
this is my spunky son! |
|
Here’s a template to show having the face centred. Then the parts that I have shaded light pink become the outside edges of the block. The other parts (the tree in this photo) become the wrap that you staple behind the block.
|
|
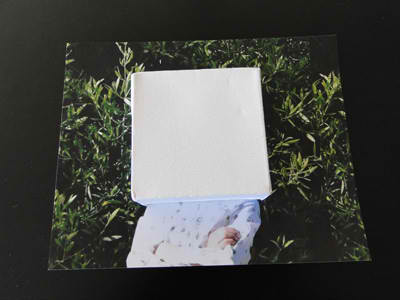
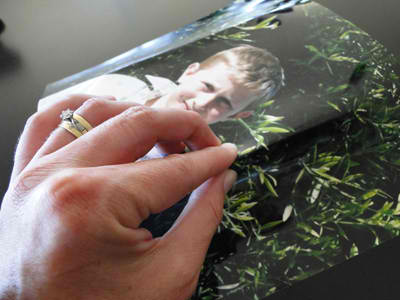
Place the block over the photo. Make sure that you have it placed evenly in the centre of the print (otherwise you won’t be able to wrap it around enough to staple)
|
|
Fold down the edges of the block. Apply pressure so you get a crease.
|
|
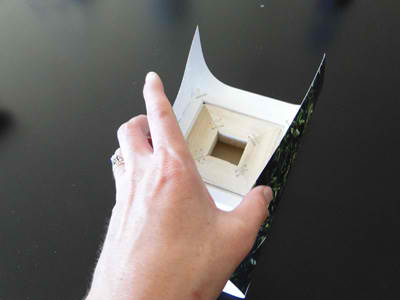
After pressing the two opposite edges to get a nice crease, turn over and fold around the block. Make sure that you can see the wooden backing. |
|
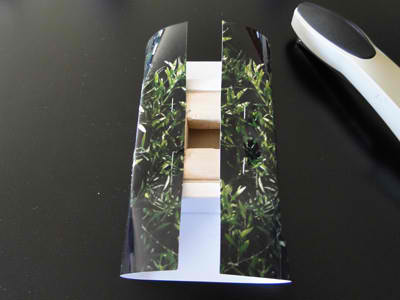
Then staple the edges down. (Open out the stapler so that it works like a staple gun)
|
|
Repeat the crease and staple for the opposite edge
|
|
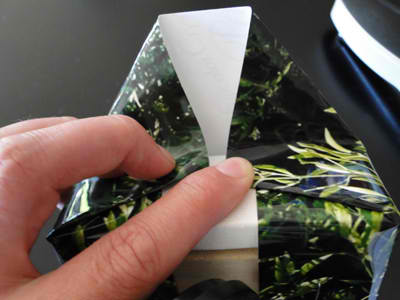
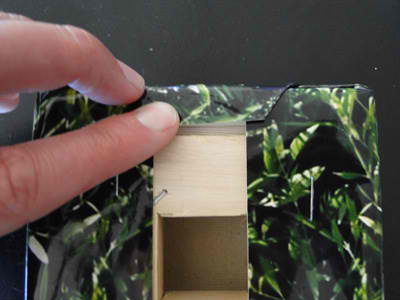
After you have folded and stapled the two edges, you’ll need to tidy up the surplus photo at the other two ends. If you had placed the block evenly, then you’ll have the same amount of surplus at each end. Fold these over like a gift-wrap box.
|
|
It may be a bit of a squeeze to get enough print to fold over and staple.
|
|
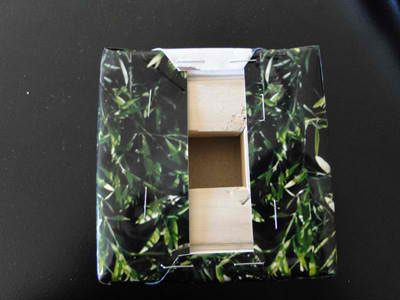
After folding and stapling, you’ll have the finished box.
|
|
Hang with a drawing pin – which goes into the little vacant hole in the middle of the block.
|

This technique also works if you have nice gift wrap or serviettes etc and you can do it with different size block canvas
Let us know if you try it!!
Franny x aka Breastmates (and join our Facebook page!!)